These are very basic directions. Refer to the photos often.
PDF patterns can be found here. Print full size on 8 1/2" X 11" paper.
The patterns fit a plastic cup 6 5/8" tall, 4 1/8" top diameter, 2 7/8" bottom diameter
I use tacky glue and not hot melt. It takes longer to dry, but it's softer, more pliable, and more forgiving.
Glue half of a 3" Styrofoam ball to bottom of the cup. Glue fleece or thin batting to cup and trim to fit.
Overcast or surge the top and bottom edges of "body" and sew a 3/8" seam opposite the fold. Place over cup and glue to the inside, easing the excess fabric as you glue.
Cut a coat out of coat fabric and lining. Sew the 2 front seams right sides together 1/4". Turn and press. Overcast or surge the top and the bottom.
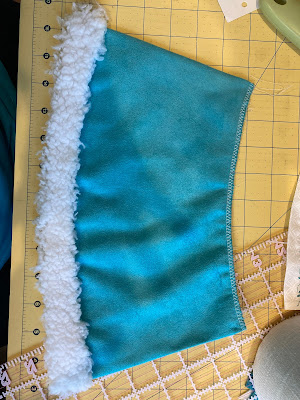
Using the coat pattern, cut a piece of low pile sherpa faux fur 1" wide and glue to the bottom of the coat.
REALLY IMPORTANT: when cutting faux fur, cut the backing only. Don't cut through any of the fur.
For Anna, cut a small rectangle of fabric about 3" long x 5" wide for blouse. Draw 4 vertical lines with an air-soluble (purple) disappearing fabric marker 3/4" apart (or fold and press 3/4" apart) and stitch pin tucks a scant 1/8" wide. Press as shown.
I didn't keep track of the dimensions of the apron pieces, but the finished overall size of the apron is about 4" wide by 4 1/2" long.
Attach blouse with a few dots of tacky glue on all sides, glue apron waistband, and glue coat with a bead of glue at the top only.
For Sven, glue the coat with a bead of glue at the top only.
Make the arms using the instructions on the arm pattern pdf.
Cut a 1/2" X 2 1/4" rectangle (again, cut through the backing only) of sherpa faux fur and glue as shown in the pic, lining up the ends of the rectangle with the seam running down the arm.
The front of the arm is positioned about 2 1/8" from the front center line. The top of the front of the arm should be about 1" below the top of the coat and the top of the back of the arm should be about 1 1/4" below the top of the coat. (I measure and mark the placement with a dot using a disappearing fabric marker.) Glue the top of the arms in place, making sure the seam running down the arm is facing the back.
Use a 7/8" or 1" wooden ball or knob for nose. It's good if it has one hole in it and one flat side, but you don't want a bead with a hole that goes all the way through. Paint it a flesh color or leave it natural wood.
For Sven, cut the beard using the pdf pattern from a very long pile faux fur. Again, don't cut the fur, only the backing. Make sure you cut so the nap is going down.
Run a bead of glue along the top edge of the beard and center the beard on the front, aligning the top of the beard with the top of the coat. Part the top 1 1/2" of 2" of fur and glue the nose firmly onto the fur as shown about 1 1/4" down from the top of the beard.
Glue the braids half way between the center front and the arms (or wherever you want them to go).
I also stuck a straight pin through the top of each braid into the Styrofoam ball to hold them in place.
Glue the nose about 1 1/4" down from the top of the coat.
If you want her to have a few wispy bangs, cut a piece of long pile fur about 1" X 4" and glue/pin it between the braids. (I don't have a pic, but you can see the bangs in the final pic.)
I cut down some knitted leg warmers to 15" long to make the hats. You can adapt socks, or better yet, knit your own!


Comments
Post a Comment